If you love classic chocolate chip cookies but don’t feel like scooping dough and baking in batches, Chewy Chocolate Chip Bars are your new best friend.
These bars deliver everything you adore about cookies—gooey chocolate, buttery flavor, soft centers, and slightly crisp edges—but in an easy, slice-and-serve form.
Perfect for parties, potlucks, lunchboxes, or late-night cravings, this recipe comes together quickly and bakes in one pan. Let’s walk step by step through making thick, bakery-style chocolate chip bars with the ultimate chewy texture.
Why You’ll Love These Chocolate Chip Bars
- Soft and chewy center
- Buttery, rich flavor
- Loaded with chocolate chips
- Easier than individual cookies
- Perfect for sharing
These bars strike the perfect balance between gooey and structured, making them easy to slice while still staying ultra-soft.
Step 1: Preheat and Prepare the Pan
Preheat your oven to 350°F (175°C).
Line a 9×13-inch baking pan with parchment paper, leaving some overhang for easy removal. Lightly grease the paper to prevent sticking.
Using parchment ensures clean edges and effortless lifting after baking.
Step 2: Melt the Butter
Melt the butter in a microwave-safe bowl or saucepan.
Allow it to cool slightly before mixing with the sugars. Warm (not hot) butter helps create that chewy texture without scrambling the eggs.
Melted butter contributes to density and chewiness rather than a cakey texture.
Step 3: Mix the Sugars
Add brown sugar and granulated sugar to the melted butter.
Whisk thoroughly until smooth and glossy.
Brown sugar is key here—it adds moisture and chewiness thanks to its molasses content.
Step 4: Add Eggs and Vanilla
Add the eggs one at a time, whisking well after each addition.
Stir in vanilla extract.
The mixture should become thick and slightly lighter in color. Proper mixing at this stage builds structure and ensures even texture.
Step 5: Combine Dry Ingredients
In a separate bowl, whisk together:
- Flour
- Baking soda
- Salt
Whisking ensures the leavening agent distributes evenly throughout the dough.
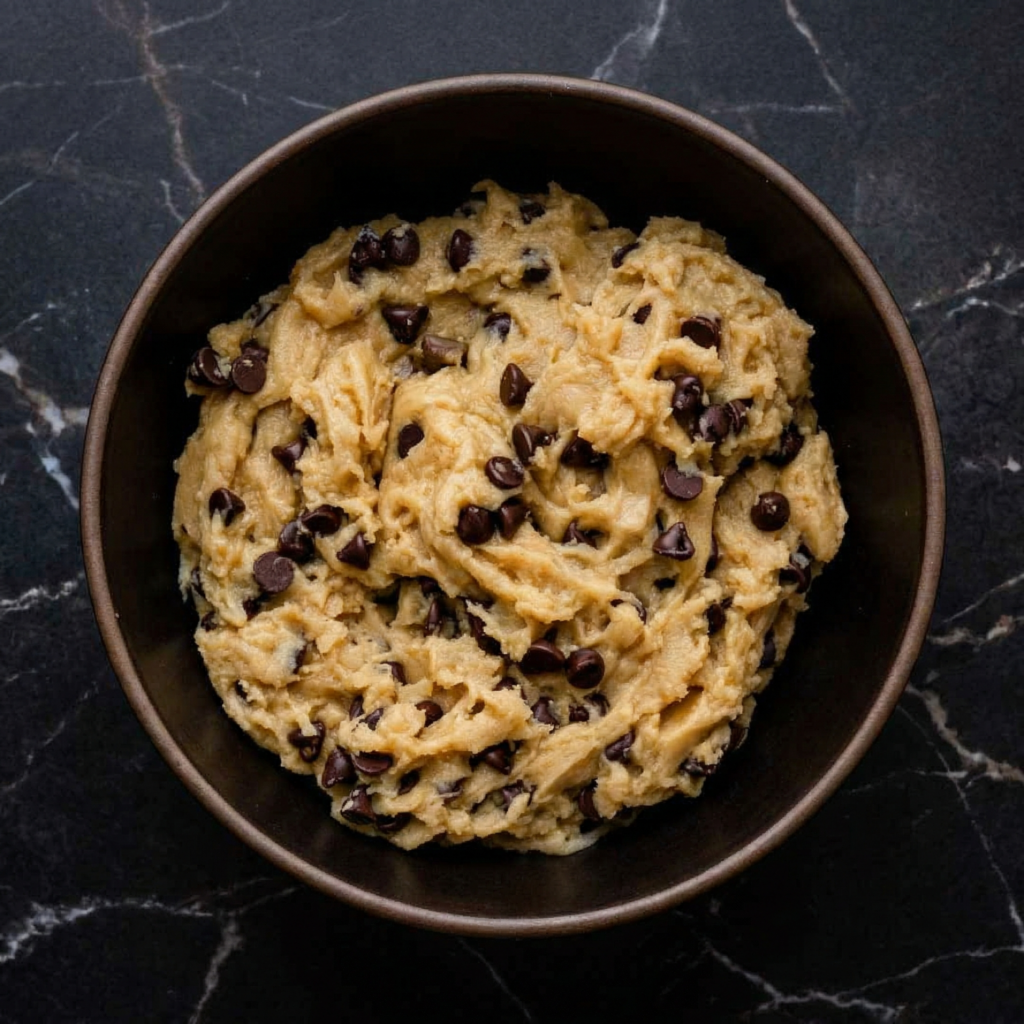
Step 6: Combine Wet and Dry
Gradually fold the dry ingredients into the wet mixture using a spatula.
Mix just until combined. Avoid overmixing, as that can develop gluten and make the bars tough.
The dough will be thick and slightly sticky.
Step 7: Fold in the Chocolate
Gently fold in chocolate chips and chocolate chunks.
Reserve a handful of chips to sprinkle on top for a bakery-style finish.
Even distribution ensures every bite has melty chocolate goodness.
Step 8: Press into the Pan
Transfer the dough into the prepared baking pan.
Use a spatula or lightly greased hands to press the dough evenly into the corners.
Sprinkle reserved chocolate chips over the top.
For thicker bars, use a slightly smaller pan and increase baking time slightly.
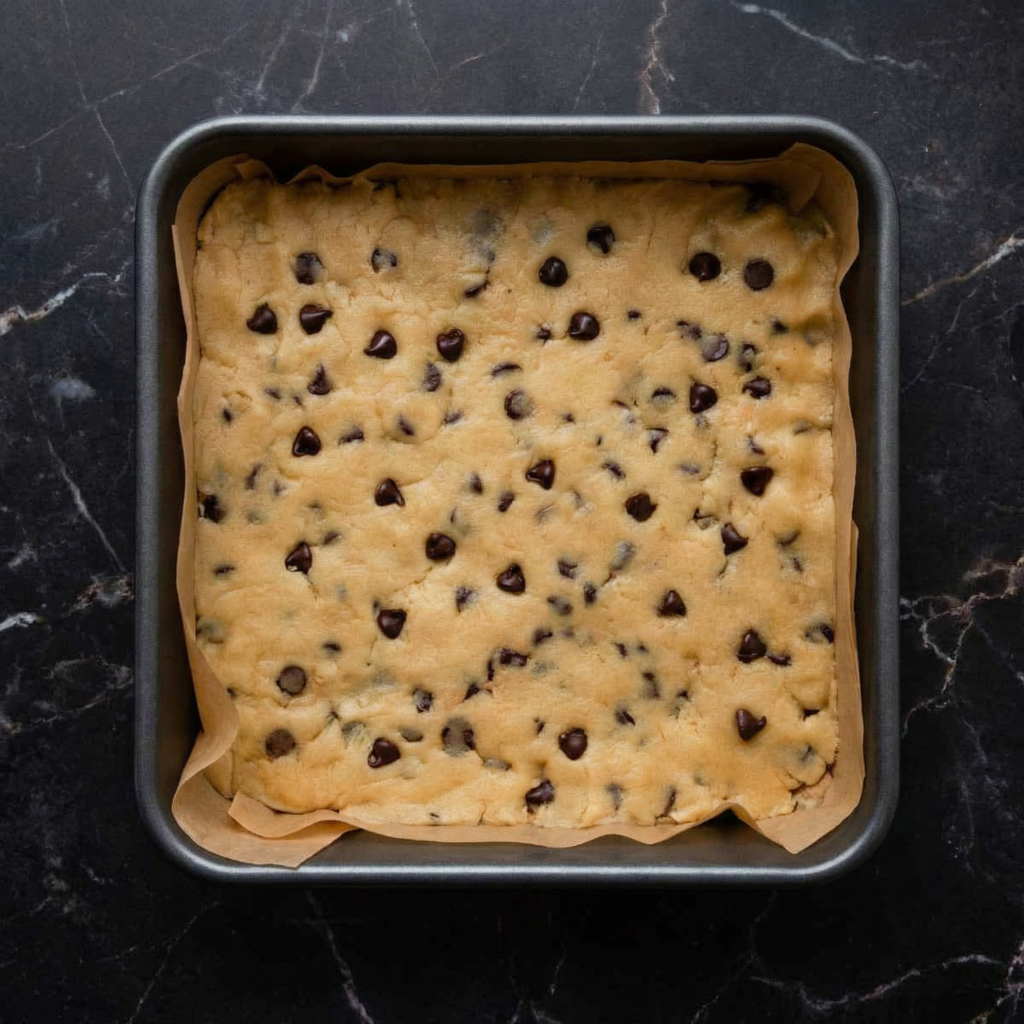
Step 9: Bake to Chewy Perfection
Bake for 22–28 minutes.
The edges should be golden brown, and the center should look slightly underbaked but set.
A toothpick inserted in the center should come out with moist crumbs—not raw batter.
Do not overbake. Slight underbaking is the secret to chewy bars.
Step 10: Cool Before Slicing
Allow the bars to cool in the pan for at least 30 minutes.
For cleaner slices, let them cool completely or chill briefly before cutting.
Lift out using parchment overhang and transfer to a cutting board.
Slice into squares or rectangles using a sharp knife.
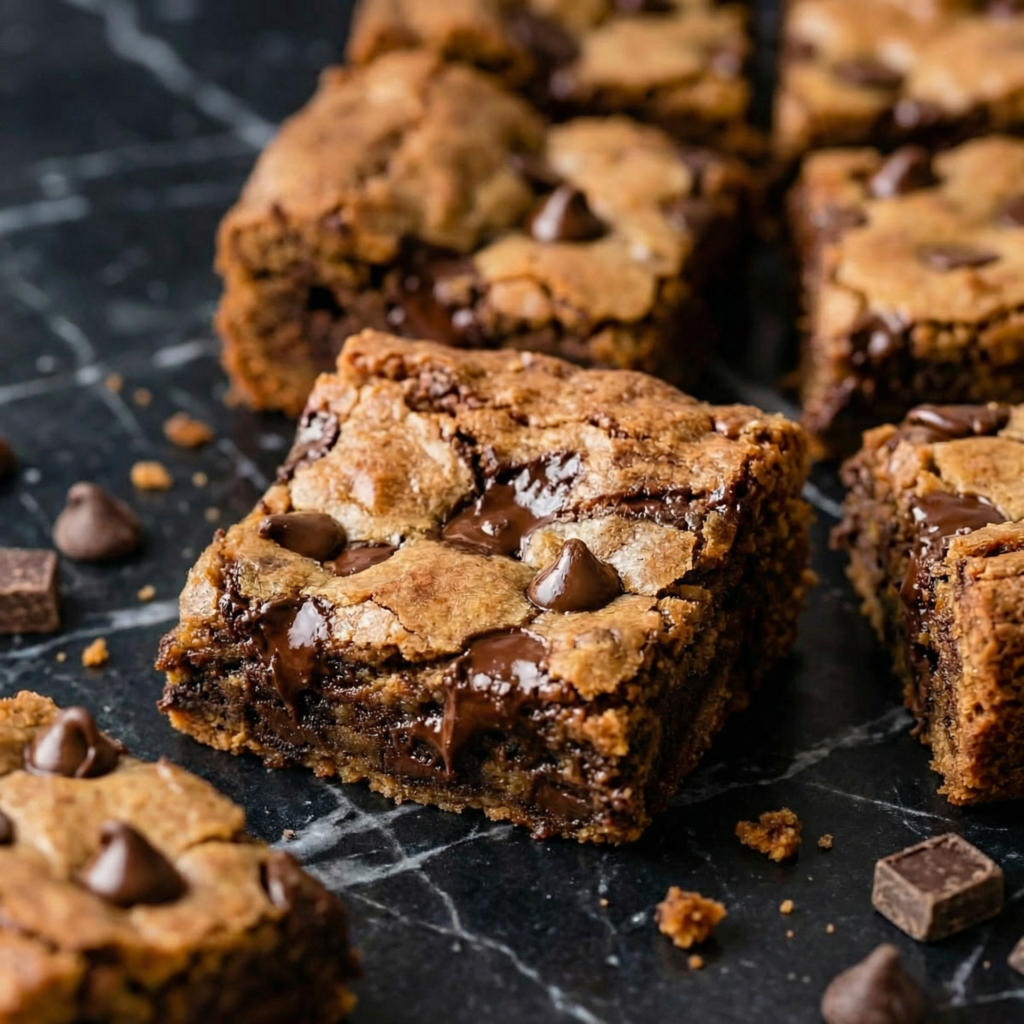
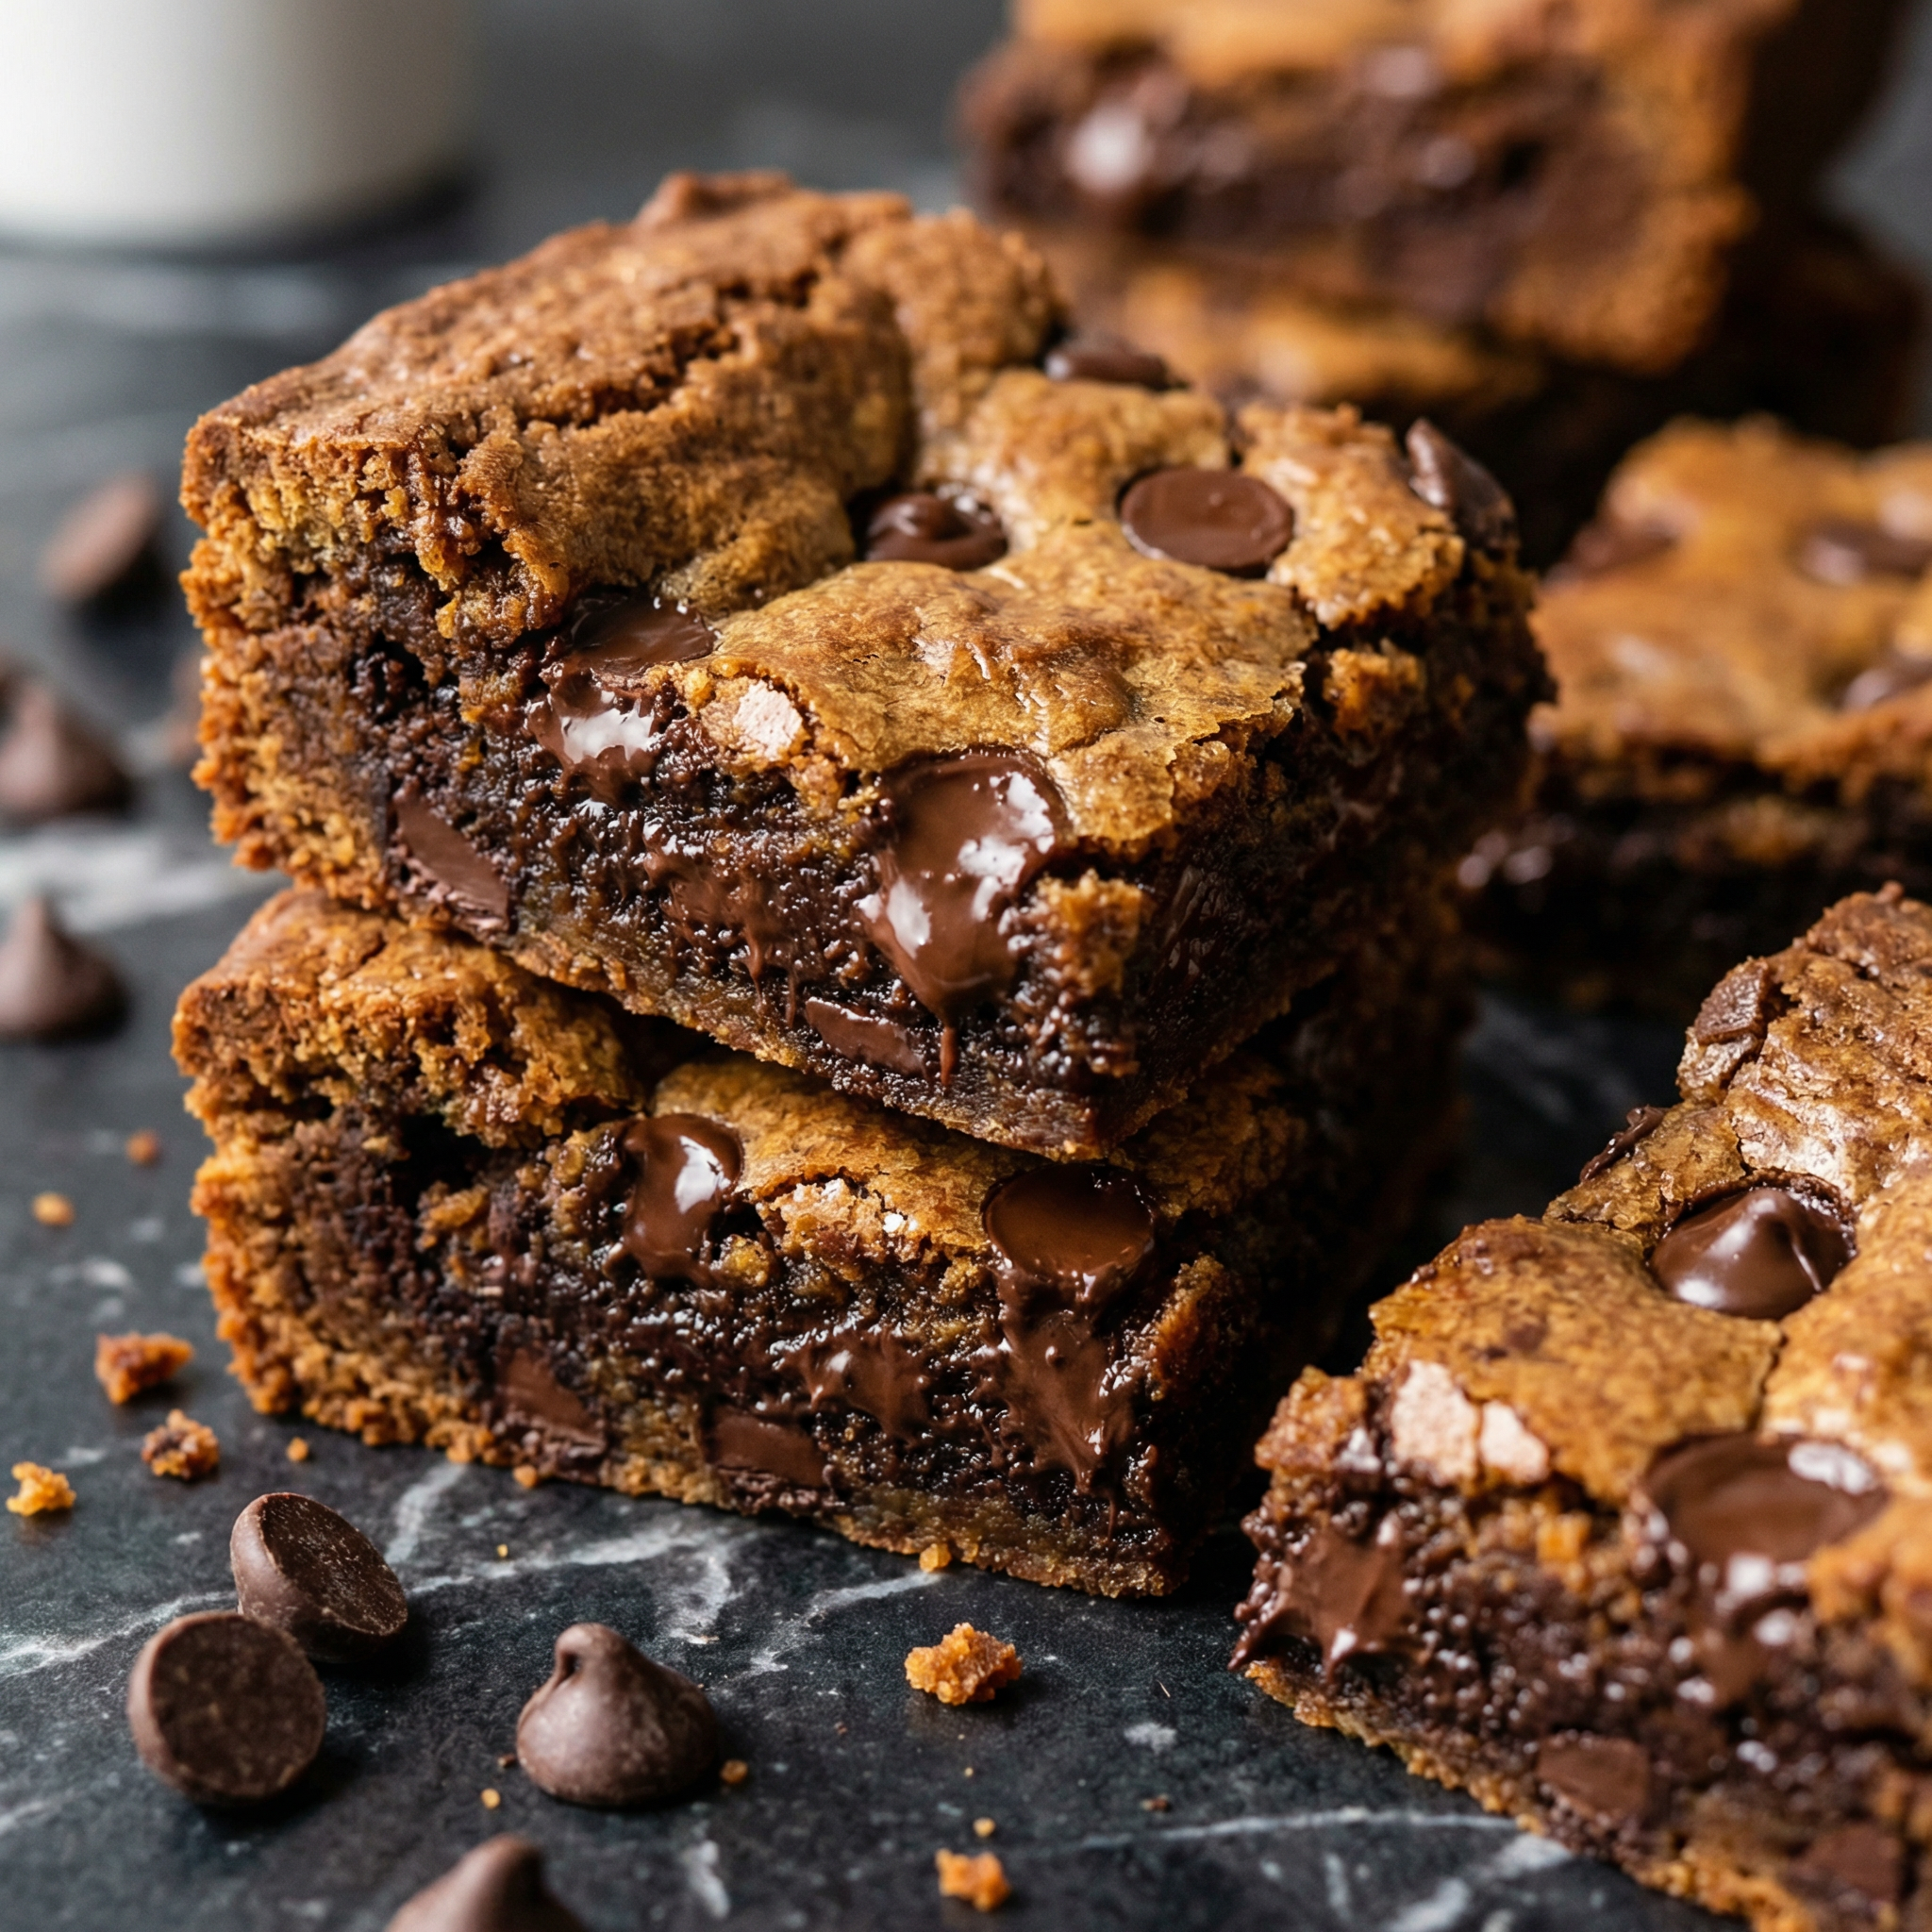
Texture and Flavor Highlights
- Soft, chewy center
- Buttery, rich base
- Slightly crisp golden edges
- Gooey, melted chocolate in every bite
- Balanced sweetness
These bars offer cookie flavor with a denser, more satisfying bite.
Pro Tips for Perfect Chewy Bars
Use more brown sugar than white. This guarantees chewiness.
Don’t overbake. The bars continue cooking as they cool.
Measure flour correctly. Spoon and level—don’t scoop directly from the bag.
Cool before slicing. Prevents crumbling.
Use quality chocolate. It makes a noticeable difference.
Optional Variations
Sea Salt Finish: Sprinkle flaky sea salt on top before baking.
Nutty Addition: Add ½ cup chopped walnuts or pecans.
Peanut Butter Swirl: Drop spoonfuls of peanut butter and swirl before baking.
Double Chocolate: Replace ¼ cup flour with cocoa powder.
Caramel Twist: Add caramel bits for gooey pockets of sweetness.
Store in an airtight container at room temperature for up to 4 days.
Refrigerate for up to 1 week if preferred.
Freeze individually wrapped bars for up to 3 months.
To refresh, microwave for 10–15 seconds for that just-baked warmth.
Why This Recipe Works
Chewy Chocolate Chip Bars rely on melted butter and brown sugar to create their soft texture. The ratio of fat to flour keeps them dense and moist, while proper mixing ensures structure without toughness.
Underbaking slightly locks in moisture, and cooling allows the crumb to set while maintaining chewiness. Using both chocolate chips and chunks creates pockets of melted chocolate throughout.
Chewy Chocolate Chip Bars are the perfect solution when you want all the comfort of cookies with half the effort. Thick, buttery, and loaded with chocolate, they’re guaranteed to satisfy every sweet craving.
Once you try these soft and gooey bars, they’ll quickly become a staple in your baking rotation—easy, crowd-pleasing, and absolutely irresistible.